Author: expert Ella Pill
Instagram: @ella_permanentmakeup
21 years in the beauty industry. An expert in permanent makeup for Eyebrows, Lips, and Eyeliner.
It is incredibly frustrating when a client comes back for their touch-up appointment with virtually no pigment retention. You did everything right mechanically, yet the skin simply rejected the ink.
Flawless retention goes far beyond the device you hold in your hand. Even with premium equipment, roughly 70% of a beautifully healed outcome relies on a deep understanding of skin mechanics. This comprehensive cheat sheet eliminates the guesswork by explaining exactly how the canvas functions. Read on to learn how to hit that sweet spot of depth, navigate diverse skin profiles, and consistently achieve crisp, long-lasting color.
Delivering top-tier permanent makeup starts with precision targeting. Think of human tissue as a multi-layered map; if you fail to accurately gauge your needle’s landing zone, your pigment simply won’t heal correctly.
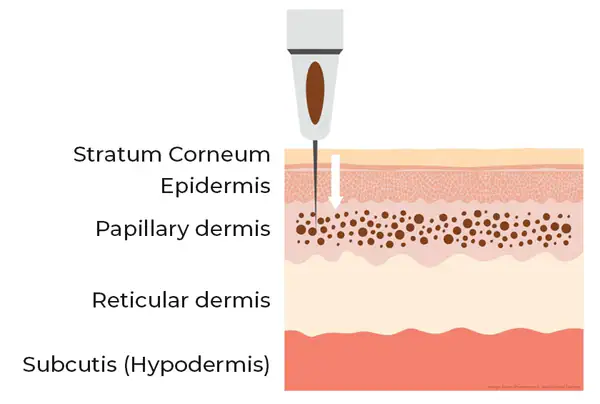
1. The Epidermis
As the body’s outermost barrier, the epidermis is in a continuous state of cell turnover. For an average adult, this shedding cycle lasts between 28 and 45 days. If your needle stays too shallow and deposits ink here, the color will literally flake off as the tissue heals. This is the primary culprit behind pigment completely disappearing or drastically fading during the first week of recovery.
2. The Dermis
Situated right in the middle, the dermis is the “sweet spot” for any permanent makeup or cosmetic tattooing procedure. When ink is successfully implanted into the dermal tissue, it anchors securely and retains its structure, ensuring your artistry remains vibrant long after the initial healing phase concludes.
3. The Hypodermis
Located just below the dermis, the hypodermis is primarily composed of fatty tissue. Striking this deep is a major procedural error; pigment deposited into the fat layer will migrate rapidly, leading to the dreaded “blowout” effect and resulting in blurry, spreading lines that are notoriously difficult to correct.
Pro Tip: If mastering this precise depth still feels intimidating, we highly recommend that beginners spend ample time practicing PMU techniques on synthetic latex before transitioning to real skin.
Nailing your needle depth is only half the battle. Assessing the client’s specific skin type is equally critical. Because every canvas varies—with texture and sebum production heavily dictating how pigment settles—you must adjust your approach. Here is how to handle the most common skin variations you will see in your studio.
Oily Skin Profiles
Characterized by enlarged pores and excessive sebum production, oily canvases are notorious for blurring healed strokes. Because ink easily migrates in this environment, you need a highly controlled, tightly spaced technique. Instead of forcefully packing in heavy color all at once, focus on small, meticulous movements to gradually layer the saturation.
Dry Skin Profiles
Dehydrated or flaky textures present a unique hurdle: they often push back against the needle, preventing the ink from smoothly entering the dermal cavity. To combat this, slow down your machine speed and hand motion. Watch the tissue’s reaction closely, depositing color only when the surface yields. Remember, thoroughly moisturized skin will invariably accept pigment much more evenly.
Sensitive Skin Profiles
Highly reactive canvases will exhibit signs of trauma, like redness and swelling, almost immediately upon contact. Efficiency is your best tool here. Limit your passes and avoid overworking any single section. Once the tissue becomes overly engorged and inflamed, it becomes incredibly difficult for pigment to anchor properly.
Mature Skin Profiles
With age, the dermis loses both thickness and elasticity, making accidental snags or excessively deep needle drops a real risk. Adopt a soft, feather-light touch and embrace a “less is more” philosophy. Over-traumatizing fragile, mature skin almost always guarantees a rough, patchy healing process.
Beyond basic oil or moisture levels, several underlying dermatological conditions can drastically sway your healed results. While your foundational technique may remain largely the same, recognizing these variables is vital for managing client expectations and ensuring procedures remain safe.
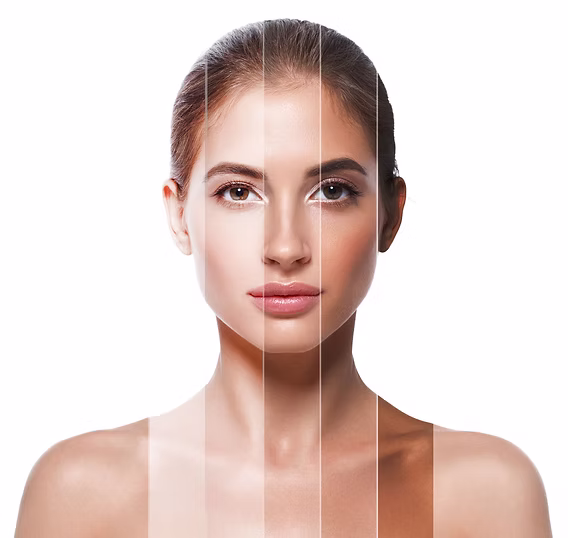
Melanin Levels and Color Contrast
While the physics of needle implantation do not change with skin tone, the density of melanin severely impacts how the final healed color is viewed. Melanin acts as an overlying biological “filter,” subtly altering how the implanted ink reads once healed. This requires strategic, intentional color theory—focusing heavily on high contrast and crisp clarity to keep the work legible over the years.
Pre-procedure consultations and physical swatching are essential here. Discuss realistic outcomes with your client, examine portfolios of healed higher-melanin cases, and physically test your chosen pigments on the skin or synthetic pads to observe the interaction. Proper upfront color planning ensures the shades you pick hold their integrity as they settle.
Sun-Damaged Skin
UV-damaged tissue is notoriously erratic. You will encounter patches of thick, leathery texture right next to dangerously thin, compromised spots. Sun-weathered skin frequently rejects ink or heals with patchy inconsistency. Always take a conservative route: plan for a mandatory touch-up session rather than aggressively trying to perfect the density in one sitting. Educating your clients on strictly enforced pre-appointment skincare routines will also go a long way in prepping a healthier canvas.
Relying on a “one-size-fits-all” pressure strategy will ruin your results. Comprehending anatomy is a solid baseline, but the magic happens when you actively translate that knowledge into your hand movements. (If you are dealing with complex cases, we recommend browsing our comprehensive PMU FAQs for supplemental guidance). Below are crucial adjustments to make for whoever is sitting in your treatment chair.
Varying Tissue Thickness
Dermal thickness fluctuates wildly depending on the facial zone. Eyelid tissue, for instance, is considerably thinner than the areas you would treat for nano brows or lip blushing. You must continuously calibrate your needle depth as you transition between zones. Ignoring these topographical shifts will result in dangerously deep blowouts in one area and superficial, patchy fading in another.
Perfecting Your Stretch and Tension
Creating a taut surface is non-negotiable for crisp results. Implementing a firm, reliable three-point stretch flattens the working area, allowing your needle cartridge to penetrate cleanly without snagging or causing excessive trauma. Whether you are navigating an oily T-zone or a dry patch, mastering your stretch is the ultimate key to locking pigment directly into the correct layer.
The Ultimate Payoff
Elevating your mechanical execution translates directly to consistency. Your healed portfolios will look spectacular, and you will drastically cut down the time spent fixing gaps during touch-up sessions. By mastering the nuances of various skin types and facial zones, your clients walk away with beautiful, long-lasting enhancements—rapidly establishing your reputation as a true industry expert.
Fluency in skin mechanics takes dedicated practice, but pairing that knowledge with an elite workstation changes the game. When you are prepared to elevate your craft, investing in reliable rotary machines, ultra-precise needle configurations, and highly stable pigment lines will guarantee consistency across every single skin type. Never forget that strict aftercare protocols are equally vital for protecting the integrity of your hard work. Treat every new appointment as an opportunity to refine your skill and build your professional confidence.
Join our intensive, hands-on permanent makeup course at All Esthetics (Floral Park, NY). Learn directly from Ella Pill, a beauty expert with over 21 years of experience in the aesthetics industry.
What You Will Get:
Turn your passion into profit by investing in a high-return skill that quickly pays for itself.
Welcome to All Esthetics
10 Verbena Ave, Floral Park, NY 11001.
Sign up for Microshading, Microblading, Permanent Makeup Lips…