
Lip blush had been on my beauty wish list for a long time. My natural lips looked pale without makeup, the border was not as defined as I wanted, and lipstick never seemed to stay where I put it. I loved the idea of waking up with a soft, natural-looking tint, but I was nervous about the healing process.
Would my lips swell? How long would they peel? Would the color look too bright? When could I wear lip gloss again?
After going through the process, I learned that lip blush aftercare is not complicated, but it does require patience. The color changes dramatically during the first few weeks, and the lips may look very different from one day to the next.
This client-style healing diary describes what a typical lip blush recovery may feel like. It is not a promise that every client will heal on the same schedule. Your artist’s instructions should always take priority because aftercare may vary depending on the technique used, your skin, your health history, and the products applied during your appointment.
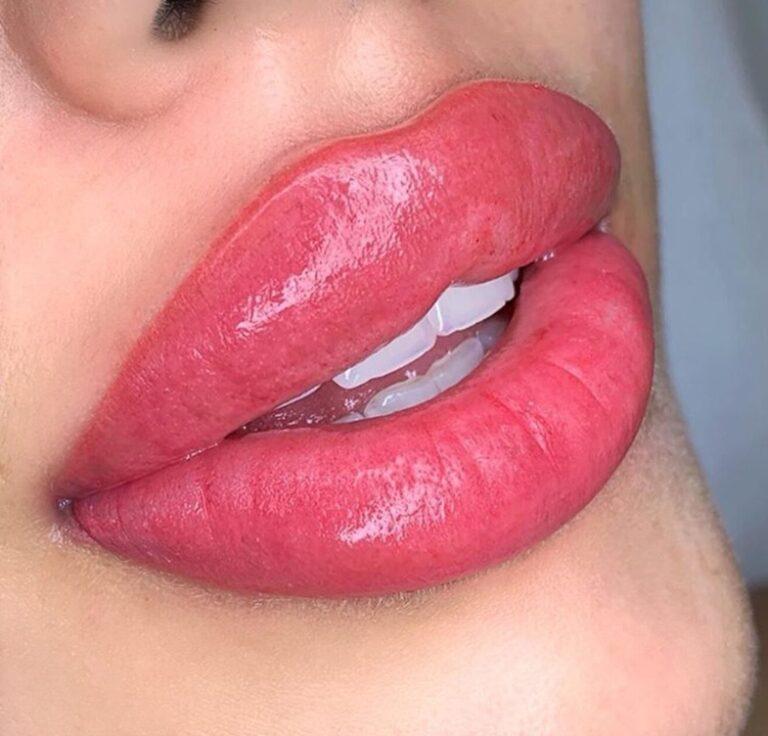
My lips had a naturally light tone, and the vermilion border—the visible edge between the colored part of the lip and the surrounding skin—was not especially clear. Even when I applied lip liner carefully, I often felt that the shape looked uneven.
I did not want dramatic lipstick color or an obviously tattooed outline. I wanted something softer: a subtle tint that would make my lips look fresher and more defined without changing their natural anatomy.
During my consultation at All Esthetics, we discussed the color, undertone, shape, and realistic healed result. I also learned an important fact: lip blush can improve the appearance of color and definition, but it does not physically enlarge the lips like dermal filler.
Once the outline and pigment shade were approved, I felt much more comfortable moving forward.
The first time I looked in the mirror, the color appeared much brighter than I expected. My lips were also swollen, especially around the center of the upper lip.
Even though I had been warned about this, seeing the immediate result was still surprising. The lips looked bold, glossy, and much more saturated than the soft healed color I had selected.
This is one of the most important things to understand before having the procedure: the color seen immediately afterward is not the final result. Mild swelling, tenderness, tightness, and stronger-looking color are common during the first 24 to 48 hours.
My lips felt similar to a combination of:
The discomfort was manageable, but I became very aware of every movement my mouth made.
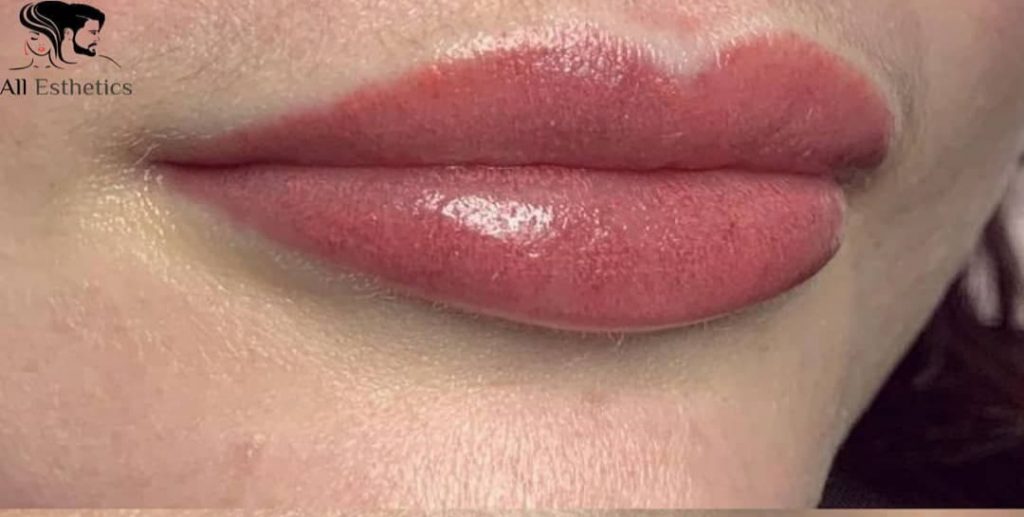
Before leaving the studio, I received instructions explaining how to keep my lips clean and protected. I followed those directions rather than experimenting with random skincare products.
My basic routine included:
The American Academy of Dermatology recommends washing your hands before touching healing permanent makeup, using fragrance-free products, and contacting the artist and a board-certified dermatologist if signs of infection develop.
I resisted the temptation to apply my usual lip masks, flavored balms, exfoliants, or glosses. During healing, more products do not necessarily produce better results. Unapproved products may contain fragrance, acids, colorants, or other ingredients that irritate freshly treated lips.
During the first few hours, my lips felt swollen and tender. The color gradually became deeper and slightly warmer than it looked immediately after the appointment.
I kept my hands away from my mouth and used only the product recommended by my artist. I applied a thin layer rather than covering my lips with a heavy coating.
Eating required a little more attention than usual. I chose small bites and mild foods that did not require opening my mouth very wide. I also avoided very hot, spicy, salty, and acidic foods because I did not want anything to sting or irritate the treated area.
I drank carefully and kept cups, utensils, and anything touching my mouth clean. I also avoided kissing and other contact that could introduce bacteria or create friction.
By the end of the day, the swelling had started to improve, but the color still looked intense. I reminded myself that judging the final shade on Day 1 would be meaningless.
When I woke up on Day 2, my lips were still slightly swollen, but they looked much closer to their normal size.
The biggest change was dryness. The lips felt tight, and fine lines became more noticeable as the swelling decreased. At times, I experienced mild tingling and sensitivity, especially around the edges.
The color had also shifted. What initially looked bright and almost lipstick-like began moving toward a softer pink tone.
I continued following the same routine:
I found that frequent mirror-checking only made me more anxious. The appearance was changing too quickly to evaluate the final result.
Days 3 and 4 were the least attractive part of my lip blush healing process.
The lips felt dry and slightly stiff, and the surface began to flake. Small sections started lifting near the center of my lips before the peeling moved toward the outer edges.
This was also the stage when I most wanted to interfere with the healing process.
A loose piece of skin may look as though it is ready to come off, but pulling it can remove healing tissue and pigment with it. Picking can contribute to uneven color, delayed healing, irritation, and possible scarring.
I let every flake release naturally.
I also tried not to stretch my mouth excessively. Large bites, exaggerated facial expressions, and wide yawning felt uncomfortable because the dry surface could crack at the corners.
Although the peeling looked dramatic to me, it was not as noticeable to other people as I imagined. A clean face, minimal makeup near the mouth, and a little patience were enough to get through it.
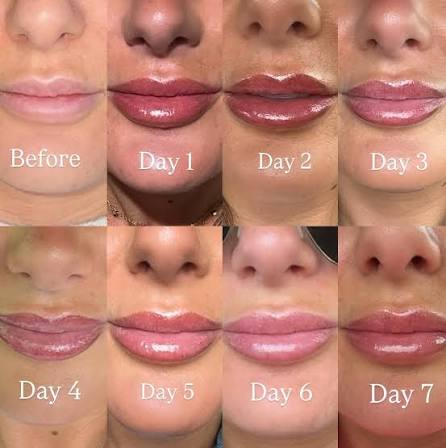
By Day 5, most of the visible peeling had either started or finished. The fresh skin underneath looked smoother, but the pigment appeared much lighter than it had during the first few days.
For a moment, I wondered whether the color had disappeared.
This is where realistic expectations matter. After the surface flakes, the pigment may temporarily look pale, uneven, or cloudy. The lips are still healing, and the color has not finished settling.
I did not assume that a lighter section meant the procedure had failed. I also did not try to cover it with lipstick.
The most useful advice during this stage was simple: do not evaluate pigment retention while the skin is actively recovering.
By the end of the first week, the thickest peeling had stopped. My lips still felt drier than usual, but speaking, smiling, and eating had become much more comfortable.
Some areas looked more pigmented than others. Instead of trying to correct the difference myself, I continued using only the recommended aftercare product and allowed the skin to recover.
At All Esthetics, clients are advised that the visible surface-healing stage generally takes approximately 7 to 10 days, while the complete healing and color-settling process takes longer.
Even when the surface looks healed, the tissue underneath is still recovering. That is why returning immediately to exfoliating lip products, strong skincare ingredients, or unnecessary friction is not a good idea.
Around Days 8 through 10, my lips finally began to resemble their normal texture.
There was still some dryness, particularly along the lower lip, but the heavy peeling was over. The pigment looked soft and natural—much lighter than it did immediately after the appointment.
I continued being careful with:
I waited until the lips were fully closed, comfortable, and no longer peeling before returning to my normal lip products.
During the second and third weeks, the shade gradually became more visible again.
The color did not suddenly appear overnight. It developed slowly, moving from a light and slightly uneven tint to a more balanced tone. The lip border also began to look softer and more natural than it had on the first day.
This is sometimes described as the color “blooming.” The important point is that the shade continues changing after the visible peeling has ended.
My lips no longer felt tender, but I still treated them gently. Once my artist confirmed that the surface had healed, I began protecting them from the sun. UV exposure can accelerate tattoo fading, so long-term lip protection is an important part of maintaining the result.
By approximately one month, I could finally evaluate the color properly.
The healed result was considerably softer than the bright shade I saw immediately after the procedure. My lips looked fresher and more defined, but they did not look as though I was wearing heavy lipstick.
The final color and pigment retention should generally be assessed after the full healing period rather than during the first week. All Esthetics advises that complete lip blush healing commonly takes approximately four to six weeks.
A lighter spot or slight unevenness at this point does not automatically mean something went wrong. The first appointment creates the foundation, while a follow-up session may be used to reinforce areas with lower pigment retention, refine the color, or make small adjustments.
The restrictions were temporary, but they played an important role in keeping the area clean and reducing irritation.
During the initial healing stage, I avoided:
These restrictions should not be treated as a universal schedule for every person. Follow the specific instructions provided by your permanent makeup artist.
Welcome to All Esthetics
10 Verbena Ave, Floral Park, NY 11001.
Sign up for Microshading, Microblading, Permanent Makeup Lips…